Wednesday 16 January 2019

Rosehart Studio has a new home.

Mixed media and Powertex Fun galour over on Word Press! 
So there I was setting up my shiny new blog over on Word Press, twiddling my thumbs as to why it wasn't getting seen. And then realised it's because I have my blogger still accessible. Please do follow me across to my new blog home. I've released more blogs with videos and have now created my very own You Tube channel. See you there Anna xXx https://rosehartstudio.home.blog/

1

Friday 26 October 2018

Something wicked this way comes!


Some of our family live in Canada and it's kind of a big thing to decorate your houses and go trick or treating. Every year we get photos of the different outfits chosen and the copious amounts of candy my nieces have collected. We don't so much celebrate Halloween in our household. However, I do happen to have a Harry Potter inspired room. And this guy is going to fit right in. 


He was rather a challenge but here is my ghoul inspired Dementor. And I am about to walk through with you exactly how he was created. So you can make one as a decoration for Halloween or just as a permanent feature to your room. 

Suggested Ingredients list: Wire, empty kitchen roll, masking tape, skull head, Black Powertex, cheese cloth or old t-shirt, stockinette, powercotton, white powercolor, silver colortricx, irridescent blue pigment, varnish.


Step One: I had a spare mini skull in my stash. I cut his teeth out and changed the angel of his jaw. Holding it in place with a long piece of wire. Making a loop at the top I thread the wire through the top of the head holding the jaw in place, leaving a length as his neck. Then attached to a kitchen roll, which I bent into an arch for his shoulders and covered in masking tape. I measured about 60cm of wire to pass through the roll before taping up these would become the base of his arms.


Step two: I used some masking tape to fill in his mouth and around his eye sockets which I made a little larger by cutting out with a scalpel. And started wrapping the arm wire with foil. Using more around the top and bottom end of the section to create a bone looking shape.

Step three: I took 6 lengths of quite long wire. I wanted my ghoul to have long boney fingers. Taping at the base I bent one length done to be able to attach to the arm. The other lengths I trimmed so they mimicked the length of fingers on a hand. 

 Step four: Then I started covering with masking tape. Adding tin foil at the knuckles and then covering in masking tape. Attach the hands to the end of the wire arm by winding the spare wire at the hands wrist section around the bone arm base. Cover up with masking tape.

Step Five: This is the type of base you want to have created. I covered in Black Powertex and kitchen roll to give the base and extra sinewy finished. But you can skip that part if you like. 


Step Six: I draped a piece of cloth over the shoulders to create a base to work up from. An old pair of cheese cloth curtains, but you could use an old t-shirt.

Step Seven: Create a hood with lighter cheese cloth material or t-shirt. Then add stockinette to add depth and texture and then some Powercotton draped over for extra texture.


Drape all the different textures through the boney fingers.


Step Eight: My favourite part. Dry brush using varnish and white powercolor. I then used a touch of silver colortricx in places. And for the hands and the face a touch of interference blue powder pigment from The Secret Art Loft range. 


 I love to show how you can make a piece by re-purposing or building your own base. If you don't wish to create the structure you could always buy a skeleton base instead and decorate that in the same way. I also forgot to add some paper decoration. I love this as texture it would work perfectly for this project. The great thing about Powertex is you can add to it when dry. So I can always go back and add some paper dec at a later date! 

Don't forget to share all your makes with us on Facebook in The Powertex Studio group or on the Powertex Addicts United page.

You can find me at Rosehart Studio on Instagram, Facebook and Pinterest. Toodles Anna xXx

Sunday 30 September 2018

Creative secrets with Anna Emelia Howlett

My Design Teamie at Powertex UK Kore Sage interviewed me recently and here is the fab article. Do check out her website here.

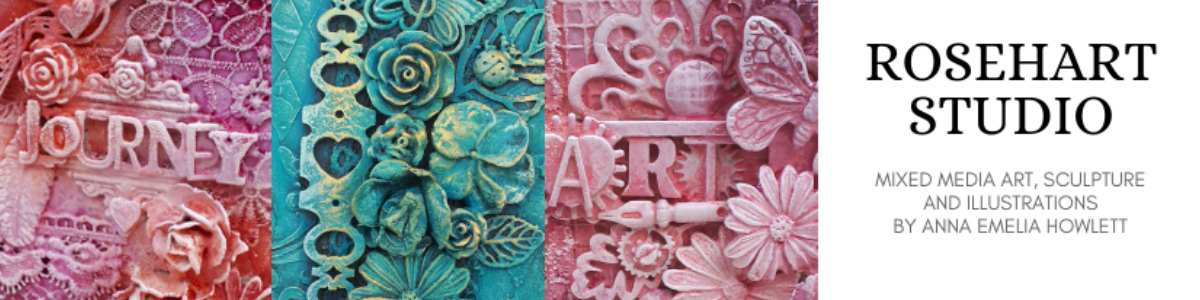
Anna Emelia Howlett from Rosehart Studio
Anna is the artist and designer behind Rosehart Studio in Kent, UK. She has a recognisable, colourful style and great attention to detail in her work, from handmade journals to carefully illustrated greeting cards.
Anna Emelia Howlett
Anna Emelia Howlett
She is also a Powertex tutor, member of the Powertex design team and finds time to be Press Office and social media star for Powertex UK! Phew. Anna agreed to let me interview her about her creative life and loves, so this is my chance to get behind the artwork and hear her story.
Rosehart Studio
Rosehart Studio
Hi Anna,
Thanks for taking the time to answer a few questions. I already know a little about your creative journey so I’m excited to share what you have to say. Here we go.
When did you start creating and what is your first memory of making art or being creative?
My mum always had us drawing, sewing, building or crafting something from age dot. I like to think that I had what I like to call a proper childhood. Does that make me sound really old now? Lol…you know in the good old days when all we had was colouring books and reading to entertain us or exploring the countryside. 
I remember we used to spend the whole 6 week summer holidays at my nans in Devon and she would take use to this store called Normans in Budleigh Salterton. We used to go upstairs into the biggest room which was a wonderland full of things for little people. If it wasn’t fuzzy felted pictures to colour in, it was the giant poster roll sets with crayons, dot to dot, colouring books or those little books with the paper cutouts you built into little houses or scenes. 
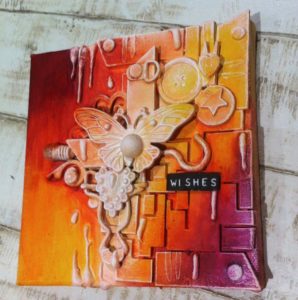
Orange Canvas
Powertex canvas
Did any experiences in your life influence how you put art and creativity into your life as an adult?
I had studied art at college and then horse care, ending up in Australia working with event horses. I came back and my mate from college got me a job in Cross’s art shop, then I moved to a beautiful old art shop in Tunbridge Wells, then Hobbycraft. I was always creating one thing or another but had been put off by an artist coming into college and telling us how hard and competitive it was being a self employed artist. My school teacher also told me through my A levels how I would fail. 
I ended up managing a Pets Corner shop but a couple of years in, my 19 year old colleague was killed in a car crash. A year later her brother in law also died in a car crash. I had been asked by a customer to create a canvas for a charity auction and painted a fish in memory of Jess. I started to believe I was meant for something else, that life was too short, so quit my job and turned to my art as a source of therapy and income.
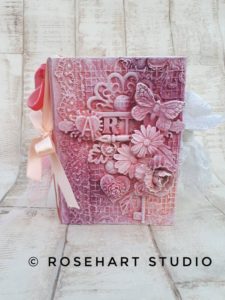
Art handmade journal
Following such tragic events, now that you have a creative practice back in your life, what do you think the benefits are?
My art isn’t just a form of income. I love to share my experience and skills through teaching others and seeing the confidence it gives them makes me feel like I have a purpose. My art is more than just a creative expression, it’s my therapy as well. With Powertex you become part of a family where you make friends with other tutors and students, sharing and gaining from their experiences. 
The benefits are wonderful but making art can also come with some challenges! Do you have any advice for coping with loss of creative mojo or feeling self doubt with creative projects? 
I’m the best for giving advice and the worst for taking it. Surround yourself with a couple of really good friends who know exactly what you’re going through as they do too. Talk it out with one another and maybe even video chat and create together. Most of all don’t beat yourself up, I used to do this. Sometimes I think people think I can do or create anything at anytime I want. I struggle through sometimes which isn’t very enjoyable at all but I try not to beat myself up about it and just give myself the space I need. Then I can come back to my ideas with fresh eyes. I also watch videos by other artists, Marta Lapkowska gives great pep talks and reminds me to just do it and not over complicate things.
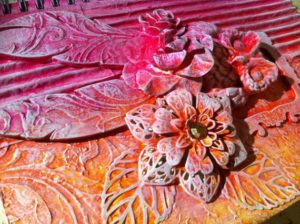
Handmade Journal Close up
Not beating ourselves up is valuable advice! Do you have any artistic or creative heroes? Has anyone in particular inspired you with their work?
Tracey at Powertex UK has been the greatest mentor and influenced my art and confidence through her guidance, training and her stunning works of art. I really love Marta Lapkowska at the moment. I have learnt a lot from her you tube videos, she gives away a lot of techniques but I love her chitty chats as she basically tells you to go for it and not hold anything back. Which you just need to hear sometimes, right! 
Do you have a favourite product or medium to work with and why? 
It has to be Powertex. It has literally changed my life. Thank goodness for the day I met Tracey. I also really wish I had access to it for A level I could have created some really neat sculptures. I also like the fact that it is so versatile you can paint and sculpt with it, make clays and all sorts of textures.
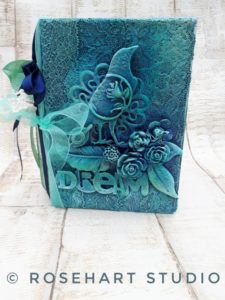
Dream Handmade Journal
I know you as a Powertex tutor and artist but I know you have other creative interests. Describe these and how you balance your time between them. 
I studied Graphic Design and illustration so I love to draw and I have just found art journaling, where I can get painty and messy and play and learn with colours and techniques that I can then apply to bigger pieces. I start with a schedule that I attempt to stick to and focus by not getting distracted by my creative brain. It doesn’t always work out but I try not to use my energy worrying anymore as I need that energy for creating. I truly believe we have our own clock which we work to and everything will happen when it’s supposed to. It’s taken me a while to figure this out and I have to try not to panic when I only just earn enough in the month to pay the bills. 
Do you have any other projects you would like to try or creative skills you would like to learn?
I would really love to do a sculpting course. The first time I did any sculpting was with my Powertex when I started nearly 4 years ago. I really believe you can never know everything and I also love learning. I know you can read up about how to do things or watch videos but I really prefer the experience and knowledge of an expert to guide me. I’d also love to take some art journal classes. I’ve just signed up for a mentorship programme with a charity called Porchlight. I’m hoping to be able to do more project in the community work through them as well sharing my passion for art. 
So, who is your biggest cheerleader in your artistic life and what role does a creative community have for you? 
My biggest patron has to be my mum. She would have been a folk singer if it wasn’t for us kids. That was her dream so I think she is super happy to see me trying for mine.
I’d also say my biggest support, confidence builder and giver of the best advice and opportunities has been my mentor and good friend Tracey. She has really looked after me. I’ve trained as a Powertex tutor, helped on the Powertex stand at the craft shows. I’ve been on the tv as a guest presenter for Powertex, written magazine articles, I co-ordinate the design team and I’m Press office for Powertex. I’m doing things I never realized I could and I wouldn’t be able to do it without the faith of Tracey and my Powertex colleagues. Who are I’d say, an inspiration to me as much as I am to them. 
I am becoming a mentor for an arty young person soon through the charity Porchlight. If it wasn’t for everything that has happened up to this point I wouldn’t have the confidence or experience to be a support for someone else. I love encouraging younger people in their art when I was given so little support from my art teacher and for the fact they are cutting arts in schools.
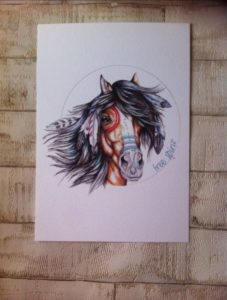
Illustrated Greeting Card
Lastly, if you could give one piece of advice to creative readers, what would it be? 
Never compare yourself to anyone but yourself. Keep everything you create, even pieces you are not as proud of so in a year you can see how far you have come. 
If you want to have the technical skill of someone you admire, put in the time and money they have to achieve it as I can guarantee that they have pretty much spent every waking hour learning, practicing and preening their skills. Creating art doesn’t just boil down to talent and creative eye. It helps but practice really can make perfect. Just get on and do it. Is that more than one ha ha?!
Haha! Thanks so much Anna for taking the time to tell us more about your arty life! It’s good to acknowledge all the work you do and I’m really looking forward to seeing what you do next. I’ve already seen some beautiful new mixed media art with your sunflowers.
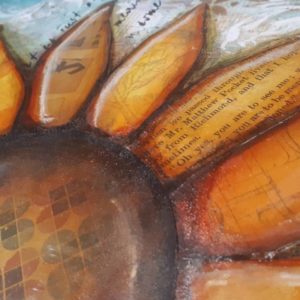
Mixed media sunflower
If you would like to see more of Anna’s work, you can find Rosehart Studio on Facebook or at Etsy.

Wednesday 19 September 2018

If unicorns could fly

So I was super excited when Tracey told me about the new animal shapes available from Powertex Uk. Especially when she said I could create a unicorn! I was so green with envy when I saw the beautiful unicorns created by everyone at the Powertex Garden Party (limited spaces are available to book for next year!Don't miss out it was an amazing weekend of relaxing, crafty fun!). I created mine with a little difference. Yes she can fly! The unicorn project pack has been put together by Tracey giving you all you need to create this. If you wish to add wings you will need wire in addition. 


Now I'd love to say I also did this bit but I was lucky enough to get a pre-made base from Tracey. As you can see from the photo you need to cover both sides of the mdf base with Powertex. Allow to dry, then use masking tape to adhere to the base.
 Then start wrapping foil around the base from the bottom up around the whole shape and use masking tape to keep in place.
 Paint Powertex over the masking tape to seal it and keep everything in place. We used Bronze.
You can choose to place the wings higher up if you wish. I used a really sharp pointed carving tool to make a hole through the tape, foil and mdf. You could use a bradle if you had one. Just make sure you watch your fingers! 


I then thredded some wire through the hole and crossed ti over the back of the body and taped in place. The wire was measured at just over 50cm, you could make them smaller or larger if you wish. Wrap the wire with masking tape and paint with Powertex. 

 From approx 1kg of Powertex and 250g Stone art tub I made up some clay. Then gradually added piece by piece. And stamped into the clay as I went. It's important to stamp the clay as you go because as it drys in the air it becomes harder to make an impression in.
I was lucky enough to have to hand an aray of these fabulous wooden block stamps. I love being at hq, I might move into our Traceys studio soon!

 I covered the whole body on both sides and stamped in different patterns.
I then tool my clay and pushed it into the daisy, pansy and rose moulds. It seems I didn't take a picture of the placement of these, but they ended up on the horses bottom. You can chose to place them anywhere.

I then coated a handful of Powercotton to create the texture on the mane and tail.


And dipped some paper dec in Powertex and covered the wire wings.


 I allowed everything to thoroughly dry and then dry brushed with some White Powertex. Just to allow the colours to come through brighter when I dry brushed them. But allowing the bronze Powertex to create the shadow for depth.
I used Burgundy powercolor into coral powercolor  on the mane.

 Rich gold colourtricx on the horn and the wings and flowers.


 I sprayed the body with brown bister to take the edge off the white. And added a mix of coral and white and layered up the colour on the body through dry brushing.

Turns out unicorns can fly! Hope you enjoyed this project. Of course if you feel as though you could use some guidance with this type of project just contact your local tutor through the directory to book on and have a go! It really makes a difference having an expert to hand. Toodles Anna xXx Follow me on my Instagram or Facebook if you like what I do. 

Don't forget to share your projects on Powertex Addicts United or The Powertex Studio on Facebook. Keep up to date with the latest at Powertex UK. 

Thursday 6 September 2018

It's a me thing

So after the most amazing time away with our family in Canada I have decided to try and be a little better with my blogs. I guess we will just have to see how long this lasts. lol.... I had the most amazing time showing my littlest niece the wonders of journalling, well she is not so little and will be 13 on Christmas day. But I am hoping I have inspired her and also got her addicted to art journalling. Better than being stuck in front of the telly right? 

I did promise I would put a blog together of our arty creations, but the time just flew by and we were having too much fun. I think we managed to get our page a day done nearly which would have ended up being 20 pages. I have fallen in love with journalling and I'm even creating art in this style now. Don't worry I am still very much loving my Powertex, I am really excited about combining the two as well. I use Powertex in my journal to experiment and discover like a sketch book. 

There are so many amazing mixed media artists to be inspired by I happen to love Marta Lapkowska follow her blog and watch her you tube channel for inspiration, ideas, the motivational chit chat and for the company. The studio can be a lonely place at times and staying motivated can be a daily challenge when you're a full time artist.

So here is a piece I have just finished, I created the base a while ago when watching Martas video on breaking a blank page. I have lots of off cut scraps I had been keeping and wondered what for apparently this page! I am obviously missing all the beautiful sun as the colours are bright. Or I think that just might be a me thing ha ha. Well, what's not to love about being colourful! I really could have added some black and more details, but I decided I loved the simplicity of the design too much.

I just wanted to use the base as a way to experiment with my materials so had no idea where this was going. I tried out some very old chalk markers I had hanging around. Another idea from Marta. Some cheap ink pads I had picked up, I don't have funds for the expensive ones yet. A white dovecraft chalk marker, which is more like a really soft oil pastel in a pen and dissolves in water. I actually really love it, but wouldn't have classed it as a chalk marker. And some cheapy stencils I picked up at Walmart. And some washi tape from Michaels craft store. 


I definitely recommend journalling to experiment, learn and let your art flow freely. Plus, if you're itching to create but can't get all your stash out, a journal and a couple of pens and inks definetly fill the void. Enjoy. Toodle pip Anna xXx I would love if you gave me a follow on Instagram or Facebook. Or even let me know what you think in the comments section. 


Memories are special moments that tell our story

Memories are special moments that tell our story

This month the Design team has been given free rein to create a piece of keepsake art. I decided this was the perfect opportunity to take some bits and pieces rescued from my nans button box and various pots of broken bits she has kept over the years and not thrown away from her house. Last year we had to clear out my nans house because she has dementia and could no longer look after herself, so had to move her closer to us. I think she had kept everything she had ever owned. There were so many memories in bin bags in the loft. We saved some things but we couldn't possibly save them all. Lots of memories came flooding back when we entered the sewing cupboard of summers spent in Devon at my nans sewing and creating book marks. Raiding the button tin mostly just to look at the wonderful assortment rather than use any of them. 


I had prepared the base of a blank canvas a while ago with White Powertex and Easy 3D Flex. I then sprayed black bister into the cracks to make them more prominent.


 I took an assortment of elements  I had taken from my nans house. I kind of thought that they deserved to be used somehow after all she had spent her whole life keeping all these little bits and pieces. Old keys, broken watch straps, buckles, buttons, brooches, broken christmas decorations. 
 I found some textiles that would compliment the layout, lace, power cotton and some netting. And created a composition. 
 Now was the time to stick everything into place and coat with Powertex.
 I then resprayed with black bister just to some extra depth in the colour. 


 I then took the new Secret Art Loft acrylics and painted up the left side of the canvas in Plum pudding and right side in Mint Jelly. Adding some highlights with white Powertex.

 To finish off the piece I decided to use some of the Powerwax with the Limoncello Gold pigment powder from the Secret Art Loft.